

프로젝트에 쓸 에디터 선정에 많은 고민을 했다. React 사용자들이 주로 사용하는 에디터를 조사해서 몇 가지로 추려내었다. 에디터 선정을 위한 기준은 다음과 같았다.
- 직관적인 UI
- 사용자가 개발자가 아니기 때문에 마크다운에 치중하지않은 wysiwyg 에디터가 필요했다.
- 주 사용언어는 한글이다. 따라서 한글에 맞춤화된 에디터가 필요했으며, 메뉴 설명 또한 한글로 되어있어야 했다.
- 표 첨부, 사진 첨부 기능이 있어야 했다.
react-quill, summernote, Slate 등의 많은 에디터를 살펴봤고, 결론적으로 NHN사에서 제공하는 Toast Editor를 사용하기로 했다.
설치🛠
react에서 사용하기 때문에 리엑트 버전을 설치한다.
npm i @toast-ui/react-editor
css이 따로 추가되어있지 않기 때문에, css파일도 같이 import 해줘야 한다.
import { Editor } from '@toast-ui/react-editor';
import '@toast-ui/editor/dist/toastui-editor.css';
function EditorBox() {
return (
<Editor
initialValue="hello react editor world!"
previewStyle="vertical"
height="600px"
initialEditType="wysiwyg"
useCommandShortcut={false}
/>
);
}
export default EditorBox;initialEditType은 처음 언어설정을 마크다운으로 할지 위지윅으로 할지 선택하는 속성이다.
마크다운은 ‘markdown’, 위지윅은 ‘wysiwyg’이라고 명시하면 된다.
추가로, 만약 한가지 타입만 사용하고 싶다면, hideModeSwitch: true 로 설정해줘서 하단의 타입 선택 탭을 숨길 수 있다.
플러그인 추가 (color picker)
기본 에디터 컴포넌트에는 글자 색을 지정하는 메뉴가 없다.
이 기능을 제공하기 위해서는 새로운 라이브러리를 깔아줘야 한다.
npm install @toast-ui/editor-plugin-color-syntax
import 해야 할 css파일은 두 개이다.
import colorSyntax from '@toast-ui/editor-plugin-color-syntax';
import 'tui-color-picker/dist/tui-color-picker.css';
import '@toast-ui/editor-plugin-color-syntax/dist/toastui-editor-plugin-color-syntax.css';
<Editor
        initialValue="hello react editor world!"
        previewStyle="vertical"
        height="600px"
        initialEditType="wysiwyg"
        useCommandShortcut={false}
        plugins={[colorSyntax]}
      />
plugins 속성에 배열로 colorSyntax 를 추가해준다.
언어 설정
기본 언어가 영어로 설정되어있기 때문에 한국어로 바꿔주어야 한다.
import '@toast-ui/editor/dist/i18n/ko-kr'; function EditorBox() {
return (
<div className="edit_wrap">
<Editor
initialValue="hello react editor world!"
previewStyle="vertical"
height="600px"
initialEditType="wysiwyg"
useCommandShortcut={false}
plugins={[colorSyntax]}
language="ko-KR"
/>
</div>
);
}
export default EditorBox;Editor컴포넌트에 language 속성을 추가해준다.

이제 도구 설명 툴팁이 한글로 나온다.
Ref 설정
작성한 텍스트를 가져오거나 셋팅할 때는 인스턴스에서 매서드를 호출해야 한다.
이 작업을 위해서는 먼저 Editor 컴포넌트에 ref를 설정해주어야 한다.
function EditorBox() {
  const editorRef = useRef();

  return (
    <div className="edit_wrap">
      <Editor
        initialValue="hello react editor world!"
        previewStyle="vertical"
        height="600px"
        initialEditType="wysiwyg"
        useCommandShortcut={false}
        language="ko-KR"
        ref={editorRef}
        plugins={[colorSyntax]}
      />
    </div>
  );
}
하지만 이렇게 ref 를 설정하면 정작 editorRef.current() 를 통해 가져오는 것은 에디터의 wrapper이다. 설정값들을 가져오기 위해서는 getInstance() 를 호출해주어야 한다.
editorRef.current().getInstatnce() 이 형식으로 에디터의 설정값들을 가져올 수 있다.
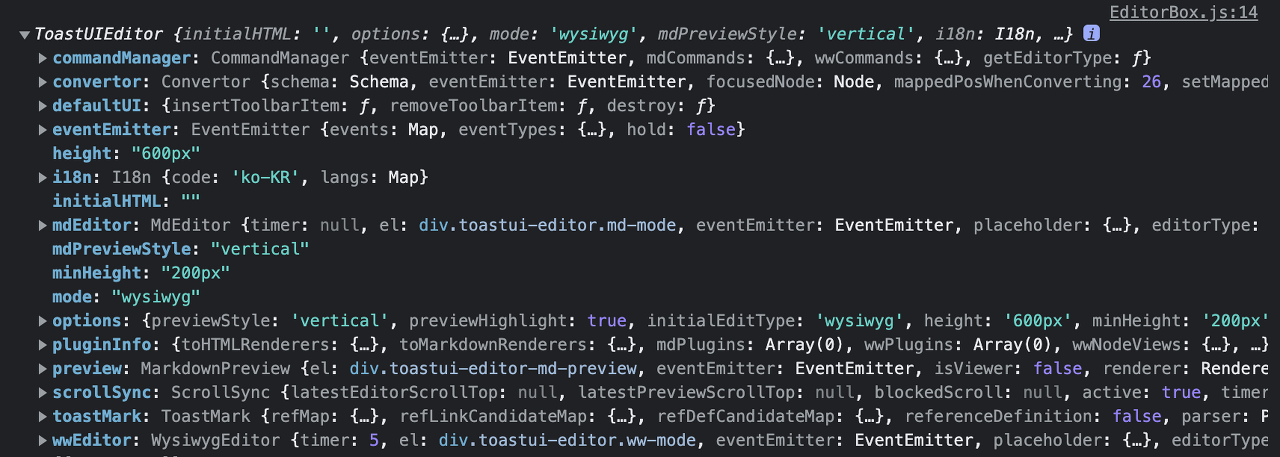
콘솔에 찍어보면 다음과 같이 나온다.
작성한 텍스트 가져오기
import { Component } from 'react';
import ToastuiEditor, { EditorOptions, ViewerOptions, EventMap } from '@toast-ui/editor';
import ToastuiEditorViewer from '@toast-ui/editor/dist/toastui-editor-viewer';

export interface EventMapping {
  onLoad: EventMap['load'];
  onChange: EventMap['change'];
  onCaretChange: EventMap['caretChange'];
  onFocus: EventMap['focus'];
  onBlur: EventMap['blur'];
  onKeydown: EventMap['keydown'];
  onKeyup: EventMap['keyup'];
  onBeforePreviewRender: EventMap['beforePreviewRender'];
  onBeforeConvertWysiwygToMarkdown: EventMap['beforeConvertWysiwygToMarkdown'];
}

export type EventNames = keyof EventMapping;

export type EditorProps = Omit<EditorOptions, 'el'> & Partial<EventMapping>;
export type ViewerProps = Omit<ViewerOptions, 'el'> & Partial<EventMapping>;

export class Editor extends Component<EditorProps> {
  getInstance(): ToastuiEditor;

  getRootElement(): HTMLElement;
}

export class Viewer extends Component<ViewerProps> {
  getInstance(): ToastuiEditorViewer;

  getRootElement(): HTMLElement;
}
Editor 컴포넌트 안으로 들어가 보면 다양한 이벤트 함수를 사용할 수 있다는 것을 알 수 있다.
이 중에서 onChange를 사용하여 작성된 내용이 변경될 때마다 텍스트를 가져오도록 해줄 것이다.
function EditorBox() {
  const editorRef = useRef();

  const onChange = () => {
    const data = editorRef.current.getInstance().getHTML();
    console.log(data);
  };

  return (
    <div className="edit_wrap">
      <Editor
        initialValue="hello react editor world!"
        previewStyle="vertical"
        height="600px"
        initialEditType="wysiwyg"
        useCommandShortcut={false}
        language="ko-KR"
        ref={editorRef}
        onChange={onChange}
        plugins={[colorSyntax]}
      />
    </div>
  );
}
html형식으로 텍스트를 가져오려면, getHTML()
마크다운 형식으로 텍스트를 가져오려면, getMarkdown()

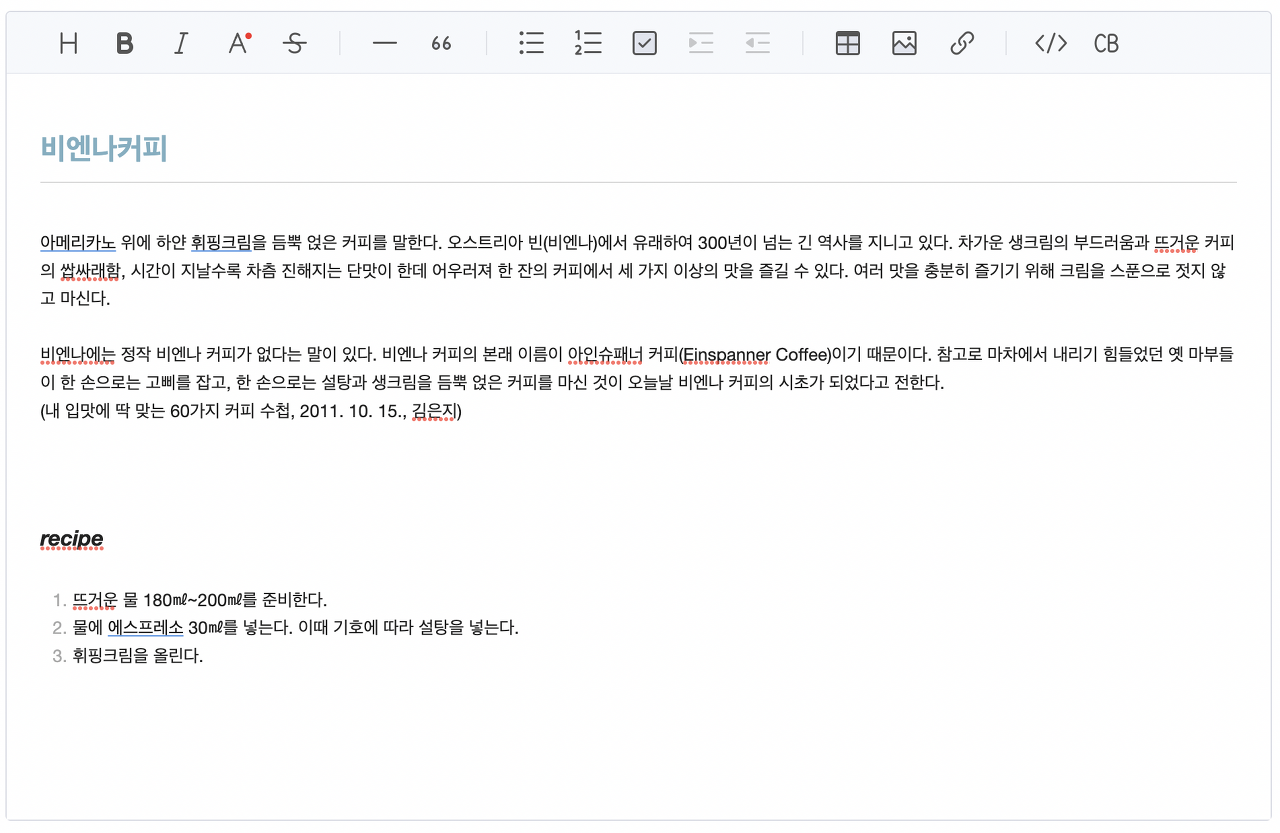
다음과 같이 작성한 텍스트를

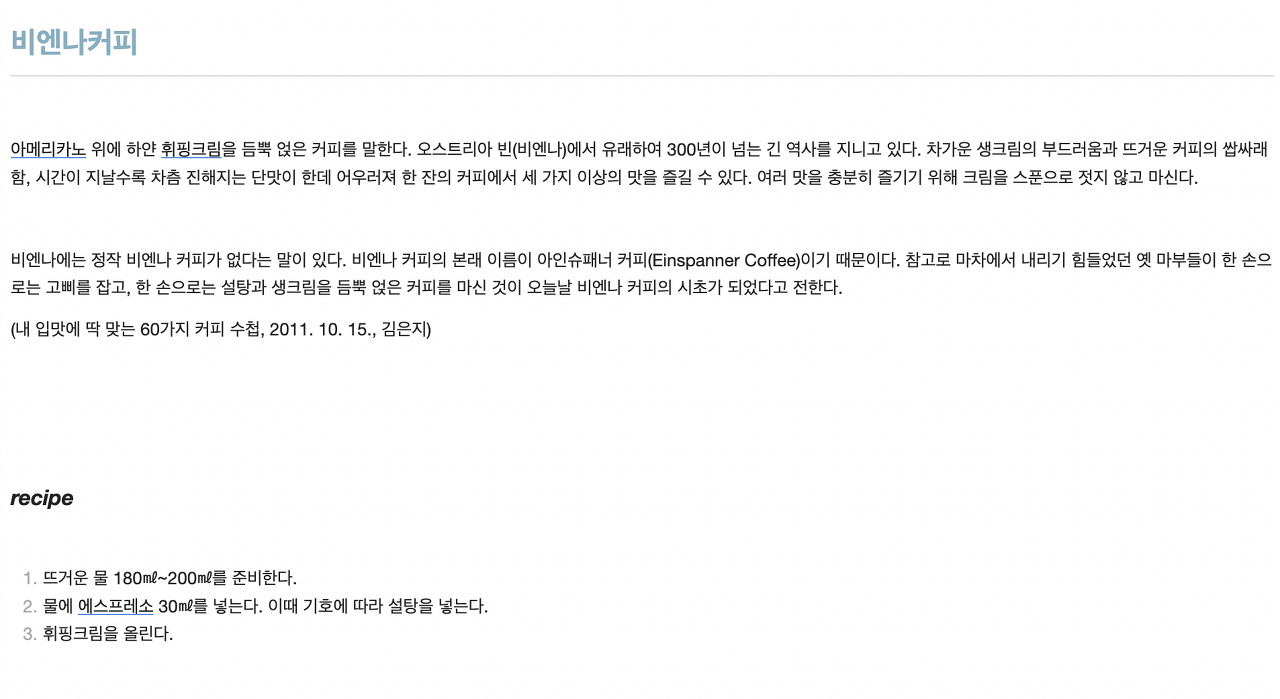
이렇게 html형식으로 얻을 수 있다.
Viewer 설정하기
import React from 'react';
import { Viewer } from '@toast-ui/react-editor';
import '@toast-ui/editor/dist/toastui-editor-viewer.css';

function ContentsViewer({ contents }) {
  return <Viewer initialValue={contents || ''} />;
}

export default ContentsViewer;
작성한 텍스트는 Viewer를 가져와서 간편하게 확인할 수 있다.
여기까지가 기본 설정이다.
다음 포스트에서는 이미지 첨부 로직을 바꿔보자.